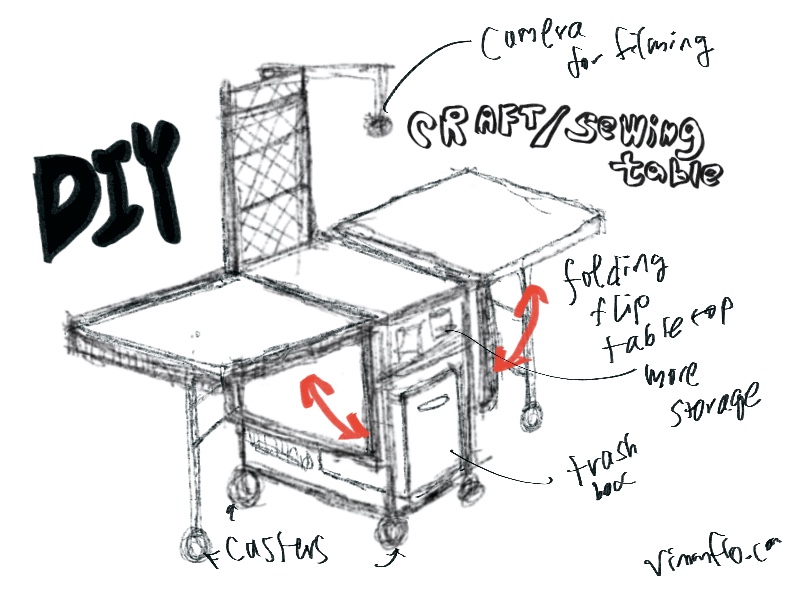
DIY folding sewing/ craft table using rack system.
My room is organized using a metal rack system from the Japanese company Iris Ohyama, though I use it in my own way to fit my specific needs. After a lot of soul-searching, I finally designed the craft and sewing table area. This table is crucial—it’s the most spacious piece of furniture you can have when building your own little crafting castle. Even with my limited space, where I’ve squeezed in a bed, office desk, and extra storage, the crafting table is essential.
However, I couldn’t just let a large sewing and crafting table take up floor space without being able to work on my projects properly.
So, I decided to take a different approach this time by designing a table that folds into three sections. This way, I can adjust the table size as needed for sewing or crafting.
The Plan:
The plan is simple. I’ll build a base with casters and shelves, then add three foldable tabletops on top of the shelves. This will allow me to open one section for smaller projects and fully extend it when I need to draft large patterns or work on bigger tasks.
Although it might get annoying to fold it up every time I finish a project, I have to make the most of this room while still maintaining enough open space to breathe and move comfortably.
This version is smoother while maintaining the original meaning and flow of your idea.
This time, I’ll also try painting the tabletop to make it more durable, so I’ll report back on how it goes. I really want to break my habit of constantly changing the room layout…
